Friday 25 November 2016

Galls as an alternative idea?

I've probably got enough weird interests, but yesterday I think I came up with another one. I was on a fieldtrip to an ancient woodland. Some of you might be going on the trip today. As we squelched and slipped through the mud, I kept seeing what I blithely assumed were tiny crab apples amongst the leaf litter. I was set on collecting lichens and tree buds, so I didn't pay them much attention. But finally I picked one up, only to find it was attached to the bottom of an oak leaf, along with a couple of others:


They weren't apples at all, but galls. How mad are they? I think pretty mad. It turns out they are called 'cherry galls' (only because they look a bit like cherries). You find them only on oak leaves - they are attached to the veins on the underside of the leaf. Here's the instigator, a tiny wasp (about 5 mm long).
CC image by Wofl
As the female lays an egg she injects the leaf with chemicals that induce the tree to grow a gall. Then the little grub lives cosily in the gall and waits until spring to pupate. It's actually even weirder than this - the wasp species has two generations each year, one asexual and one fertilised. I'm a bit unclear on the mechanics of this, but I think when the wasps (both sexes?) emerge in spring from the galls, the females lay unfertilised eggs on the tree trunk. These become protected by another sort of gall (which is small and purple). When those wasps hatch, the sexes mate and eggs are laid to produce the cherry galls.

Anyway. I recall that galls have been a 'taxonomic collection' in the past. Not that they're found on any confined group of plants, and are in fact produced by flies, wasps, aphids, sawflies... many different creatures. So if you're interested it might be worth a discussion with Katy. In any case, I think I might be keeping a closer look-out for them in future, purely out of interest.

Can you believe it, there's a British Plant Gall Society.  Britain's great isn't it.
Also I might buy myself one of these FSC Aidgap guides to galls or maybe the Wildguide. (Oh well, just bought both. Call it an early christmas present. To myself).

Monday 21 November 2016

Some trees to find with opposite buds

If I don't get my daily dose of sunlight at this time of year I start losing the will to live. So I went out for a walk on Sunday morning and combined it with some twig collecting - I was pleased by the number it was possible to find in a short period of time. Granted I do live in the countryside, so the ones I found were all British species and legitimate for your collection. I urge that if you're a beginner you start somewhere you'll find native species - hedgerows and woods. If you start in a park or garden, you'll immediately confuse yourself with exotic and cultivated plants that won't be in the book. And then you'll feel unnecessarily despondent.

There are still some leaves clinging onto the trees at the moment, and obviously these provide great confirmation of the species. But you will find that some common trees have very distinctive buds.

Aesculus hippocastanum (Horse chestnut)
You may recognise this from your childhood conker-collecting: the Horse chestnut (Aesculus hipposcastanum). It's more 'naturalised' than native, having only been brought to Britain in the last 500 years, but it will be fine in your collection. The buds are huge and very sticky and pretty unmistakable. They can be so sticky, they'll make a mess of your bag and your coat and everything they come into contact with. But less sticky when its cold perhaps. Perhaps the resin puts things off from nibbling them.

Horse chestnut belongs to the Order Sapindales and the Family Sapindaceae, so of the other trees in the British countryside, it's most closely related to the Field maple (Acer campestre) and the Sycamore (Acer pseudoplatanus). Hint: you could put those next to it in your collection.

Sycamore (top) and Field maple (below)

You'll notice all three species have buds which are opposite each other. This is less common than species with the buds sprouting alternately or spirally up the stem. Sycamore buds are noticeably green, and field maple buds are a bit fluffy at the edges.

Another really obvious one you'll soon learn is Ash (Fraxinus excelsor) with its black buds. They remind me of little pointy hooves... devilish little black hooves. But even without such imagination you can't mistake them - they're the only ones this distinctive colour.

Ash (Fraxinus excelsor)

Ash is another species with opposite buds. But it belongs to a completely different Family, and indeed a completely different Order: the Oleaceae in the Lamiales. There are related plants that might be found growing in Britain (olive, jasmine, lilac, privet) but none are native trees.

I found four more opposite-budded species:

click the photo to admire the twigs in close-up (and check out the lenticels)

You'll notice that their colours are quite different. If you decide on this group for your collection, I think it'll really open your eyes to the variation of the plants around you. At the moment it's probably quite easy to think 'oh, trees... I know what a tree looks like', but you might end up wondering if you'd had your eyes closed.

There's Dogwood (Cornus sanguinea - sanguinea = blood) at the top, with red stems that really show up on these dark days, and weird long fingery (antlery?) buds.

Next is Guelder-rose (Viburnum opulus) with rather bulbous shiny buds, and an angled stem. You are bound to see its bright red berries at the moment too.

Third down is one of my favourites, Spindle (Euonymus europaeus) with its distinctive green stem. It has the weirdest fruits which are a clashing pink coating around four bright orange seeds.

At the bottom is Elder (Sambucus nigra) which has scruffy tiny leaves instead of scaled buds. The twig has lots of lenticels. In the days when children left the house and before they became inextricably glued to smartphones, they would annoy people by hollowing out these stems and making peashooters. You might recognise its Latin name: today's Sambuca isn't made from elderberries, but there was obviously a liqueur that once was.

Elder and Guelder-rose are both in the family Adoxaceae (curiously, like the lovely ancient woodland indicator Moschatel) but Dogwood and Spindle are both quite unrelated to anything else you'd find in Britain (including each other).

So that's eight species already. I've got as many specimens again, but they have alternate buds. I'll do those in a different post.


Monday 14 November 2016

Encouragement for fern collectors

Yesterday (probably due to global warming eh) was a beautiful Sunday, with autumnal colours everywhere and blue skies and that lovely low-angled sunshine that makes everything all contrasty and dramatic. So, in combination with enjoying a country walk with my other half, I thought I'd have a look for some ferns in solidarity with the fellow pteridologists among you.

This was successful, so I offer my encouragement if you choose this group.

I live in North Wiltshire, in an area once famous for its limestone quarries. So the roads and fields are lined with walls made of limestone. Some ferns are very happy living on these. Here we have Maidenhair spleenwort, Asplenium trichomanes. It's only small and it grows in tufts on the wall or (as in this case) from the mortar between the stones of the wall.

Maidenhair spleenwort
Very close by was Wall rue, Asplenium ruta-muraria (below). It doesn't look so obviously 'ferny' as the Maidenhair spleenwort. But if you've found the latter, it's worth looking for this one too. To confirm it's a fern, look at the sori on the back of the leaves:

Wall rue
I knew both of those were around locally from fern-forays last year. But on another wall nearby I was delighted to find the Rusty-back fern, Asplenium ceterach. I've never knowingly found that one, so was genuinely nerdily delighted. It's got a lovely uneven look about it, and on the back the sori have a dense covering of scales. You can see that in the young leaves the scales are rather silvery, and in the older bigger leaves they're rust brown (hence the name).

Rusty-back fern
There is a strange 'alleyway' of two low drystone walls that you have to go down to enter the wood where we were headed. It seems to be the ideal microclimate for mosses - I've gathered many different ones there in the past, and picked up a few this time that I'll show you in another post. It also seemed good for another type of fern - a type of Polypodium.

Western polypody

I think it's Polypodium interjectum, Western polypody. That's because (unlike Common polypody), it has pointed tips to its pinnae and (unlike Southern polypody) it doesn't seem to have any hairlike structures growing amidst the sporangia. You can also find hybrids of the three, but I think the lovely bold and plump sori suggest otherwise (the hybrids are usually sterile).

Within the wood itself I came across this plant, which as you can see was far too large to fit on the photocopier. That's one thing you'll have to find a solution for when you're pressing your specimens - you'll need a bit of space, and preferably you don't want to fold them over like this!

Soft shield fern

You can see it's got beautiful reddish-brown scales at the base of the stem - it's important that you pick the frond all the way down to these when you're collecting samples.

Here's a close-up of the pinnules and sori:

Soft shield fern

If you look closely (you'll find a hand lens useful for your own identifications) you can see that the pinnules of this plant generally have a kind of mitteny, thumbed outline. Their lobes are rather pointed, with little hair points at their tip. Combined with the roundness (as opposed to a kidney-shapedness) of the covers of the sori (or 'indusia') - we know that this is a shield fern.

I've been through this wood botanising before, and I've collected both the Hard shield fern (Polystichum aculeatum) and the Soft shield fern (Polystichum setiferum) here. This has turned out to be useful, because I know P. aculeatum lives up to its name and is really quite stiff, the hair points being rather prickly. But this specimen is not like that at all, and is instead the Soft shield fern, P. setiferum. I think you'll find yourself in the same position after a while, able to make comparisons when you've found and examined a few species which (when you first look at the key) look confusing and impossible.

I also spotted some fairly miserable specimens of Bracken (Pteridium aquilinum) on the way to the wood. It's very distinctive with its large size and tripinnate structure.

Another species which is unmistakable is the Hart's tongue fern (Asplenium scolopendrium). It is everywhere in the wood at the moment, forming big exuberant green clumps of foliage. You'd be tripping over them. The sori are linear (and usually a bit clearer than on my photo).

Hart's-tongue fern
So that's seven species just from a morning's work/walk. I know there are Male ferns and Hard shield ferns close by too. So that makes nine. Hard fern is another common species but I'd need to travel elsewhere to find that one - it prefers acidic conditions. Ten species would make a very respectable start. Depending on where you can travel to, you might also be able to find Sea spleenwort (by the sea, unsurprisingly), Black spleenwort, Brittle bladder fern, Lady fern, Lemon scented fern, Broad buckler fern, Narrow buckler fern... plus others. 

The 3rd edition of Merryweather's guide is currently at a sale price of £6.50 from the FSC - a bargain.

Tuesday 1 November 2016

A reminder about fungi

Whilst out on my botanical jaunt, I also came across a few mushrooms. They were on a rough patch of grass which had somehow escaped being mown to oblivion. They had also escaped the Mushroom Kickers, probably because they were small and relatively invisible. Yes, the world can be divided into two groups of people, the Mushroom Pickers and the Mushroom Kickers. I don't really understand the mentality of the latter. Perhaps they go round kicking kittens as well.

These were the ones I found:


To be honest they are not the easiest to identify. In fact they are often collectively known as LBMs (Little Brown Mushrooms) and sometimes you have to admit defeat. But this belies their niceness. In fact you can see that they're actually all quite different. It's all about looking carefully at their shape and colour - the shape of the cap, the shape of the gills, the wavyness or sturdiness of the stipe (the mushroom 'stem'). This still doesn't make them Easy. But it might enable you to get to the right family.

Their habitat is also a useful clue. These were all amongst shortish grass - that in itself discounts many of the similar species you see in the identification books. In fact I think there's a definite gap in the market for a beginners' book with common species arranged by habitat. I have one that's almost there, but it's obsessed with edible mushrooms and gives delicate inedibles short shrift.

The most important thing I want to impart is that it's important to try and identify them as soon as possible. So you don't need to take home too many at a time - just a few is good. Then when you've had a go at identifying them (including writing all their features down in your field notebook so you remember them if you give up in desperation) - please bring them in to me and put them in the freezer in the field centre. Then I will freeze dry them for you and they will be reasonably beautifully preserved. If you can't get into college straight away then the fridge will do temporarily (in a plastic box, preferably, but don't get them mixed up with your lunch. That would be a shame as some of them are poisonous).

Fungi season is upon us so get out there into the woods and meadows and have a search.

The lovely Amanita muscaria. We found lots of these at Colehayes a few weeks ago. CC image by taras-fedora-syn
I've found a good website about UK fungi = First Nature.
It's not so easy flicking through a website as it is a book. But there's so much effort been put into writing about each species here, and there are good photos (of the whole fungus / gills or pores, and spores). It won't have everything but it's definitely somewhere to look when you've a hunch about your specimen's identity. It's made me wonder whether I've got Conocybe tenera amongst my finds.

Remember that with fungi, where you find them and how they're growing are important clues to identification. You can note their 'habit of growth' (that is, are they growing singly or in troops - (troops, excellent description), in tufts or overlapping, or in fairy rings) and whether they have any 'relationship with higher plants' (mycorrhizal species can only develop in conjunction with one or a few species of trees). All grist for your field notebook.


Autumn Asteraceae

Yesterday, trying to make the most of the autumn sunshine, I took a stroll around campus to see what was about. It's not the most promising of environments what with all the tarmac and vigorously manicured greenery. You will be able to search in much more promising locations. However, I found a few things, and I thought it might encourage you. A number of species are quite happy on wasteground and tucked into the margins.

I am quite sure I looked a bit odd, as I was adopting the slow hesitant gait of the naturalist, with my eyes scanning the ground, stopping randomly now and again to swoop on something and stuff it in a pot or plastic bag. I tried to pretend passers by weren't there. A colleague spotted me and evidently thought I looked quite amusing. But you must learn to ignore the rest of the world because they don't really understand. You will soon learn that you get a little pulse of endorphins to the brain when you find something, and this starts to outweigh any embarrassment.

I was slightly surprised to find quite a few Asteraceae still in a half-decent condition. There may be others out there. I found some Bristly Oxtongue (Picris echioides). 'Echioides' (like 'echinoderm') means spiny. It has strange bristles all over the leaves that come out from little blisters.

CC image by Isidre Blanc

I also found Wall Lettuce (Mycelis muralis) with its rather reddish stems and leaves, and distinctive 90 degree branching of the flower heads. It's rather elegant for something that most people would dismiss as a weed.

CC image by  Mount Rainier National Park
Also lurking were the universally-recognised Daisy (Bellis perennis)

CC image by Quartl
and the very common, Common Ragwort (Senecio jacobaea).

CC image by Danny S.

I also found some Groundsel (Senecio vulgaris).

CC image by H. Zell.

I seem to sit in a lot of traffic at the moment, so have been doing a bit of roadside botany through the car window. So I can tell you that although it's quite late in the year, there are still examples of Scentless Mayweed (Tripleurospermum inodorum) about.

CC image by Thskyt.
Another reliable member of the Asteraceae at this time of year is Pineappleweed (Matricaria discoidea). I found it on a track near where I live recently - it seems to like such spots. It's supposed to smell of pineapple when you squash it. You'll have to tell me what you make of that; I would say it is faintly pineappley, but only in a rather artificial pineappley sort of way with a decidedly revolting undercurrent. Apparently you can eat the flowers but I would really rather not. They're rather unusual flowers for the Asteraceae as they only have the central tubular disc florets, and no surrounding strap-shaped ray florets.

CC image by Leslie Seaton.
Pineappleweed isn't a native to the UK but has been spreading across the country since it allegedly made a break from Kew Gardens in the 1870s.

So that's seven Asteraceae that are still around and easily collectable. If you're lucky and quick you might find some more from the family. You might find Mugwort, Dandelion, a Cat's-Ear, Tansy,  Perennial or Smooth Sow-thistle around at the moment perhaps. I saw some of these from the car, and also a late Ox-eye daisy. And appearing early in the spring will be Winter Heliotrope, Butterbur and Colt's-foot. That's seventeen hopefuls and there may be others. (*This weekend, the 6th Nov, I saw a lone flower of Creeping thistle, which seems very late but shows things are still about if you look).

If you are collecting this group, try to get specimens that have flowers and aren't too miserable-looking. You'll want to collect the stem down to the ground as lower leaves can be a different shape to upper ones. Make sure you press them as soon as possible after finding them. There's more information here, but the most minimalist approach is between newspaper under a big pile of books. Then they'll dry out beautifully and will keep until hand-in.

Monday 10 October 2016

Local soil information

The abstract art of the Soilscapes map. A bit like a less colourful Patrick Heron perhaps.

This morning a student and I were poring over her fern collection, and grappling with the keys. She'd collected some from Lancashire... in fact, we thought one of the species could be the northern buckler fern, Dryopteris expansa. Hopefully she'll find examples of the more common broad buckler fern Dryopteris dilatata and be able to compare them.

Sometimes different (though similar looking) species can be distinguished partly because they grow in different parts of the country - in different habitats. Some prefer moorland, some like limestone, for example.  But how (she asked) would she know what the soil was like where she found the specimens?

You can try using the Soilscapes map from Cranfield University. It's quite detailed and will tell you whether your local soil is acidic or alkaline. It could be really useful for some additional information for your notebook / labelling.

You may also like the Geology of Britain Viewer from the British Geological Survey, which will tell you which bedrocks underlie the soil. It even tells you the geological history of the different types. It's possibly less useful unless you're looking at plants / lichens growing directly on the rock. But it's certainly very interesting.

Tuesday 20 September 2016

Welcome, taxonomic neophytes of 2016/17


Probably a metaphor for your developing taxonomic skills. CC image by Craig Pemberton.
I'd like to think this website proved quite useful to many people preparing their taxonomic collection last year. It's a quick source of advice about all sort of things pertinent to collecting, preserving and identifying your specimens. The environmental technicians are a bit fraught at the moment because we are short-staffed. But this is my favourite unit to help with, so please do still feel you can ask for help (send me an email or drop by). After all, I will soon be in receipt of a freshly-minted MSc in Biological Recording - the very qualification that would make me the ideal candidate to help you.

My main advice is to start early. Then you've got plenty of time to find specimens and learn how to identify them. You've got months and months to do this assignment (with not much else to hand in for a while) - so make the most of it and you'll get a really good mark. You might even get hooked on something you didn't even realise you had an interest in. My favourite type of id-ing involves squinting down a microscope. It can be very good stress-relief to think so closely about something different (plus you get a little endorphin buzz when you solve the puzzle). I was pleased when chatting with one of this year's third-years to hear she wants to base her research project on spiders, having been inspired by such work for her collection. Perhaps this will be you.

Currently OJ17 is a bit untidy, as we have field trips going in and out. But soon it will be clearer. And then you can come and study there whenever you like - I even have hope of running little introductory identification sessions (though everything seems a bit busy for the next few weeks).

Have a read of the overview post and different groups on the left and see what grabs you.

I have some thoughts about the successes and not-so-successes of last year's collections here.


Thursday 18 August 2016

I love things in jars

You are always welcome to visit the collection of Things In Jars in OJ17. We haven't got quite as many as the Natural History Museum in London: they have 27 km of shelves ( you can go on a tour). But our collection still represents a wide range of creatures (including even some plants). I have little idea about the provenance of many but I do like to wonder how the more exotic ones might have ended up here.

CC image by Mads Bødker

You can preserve creatures in alcohol for a long time. Charles Darwin used the technique when he was on the Beagle in the 1830s, and his specimens still survive (here's an octopus he caught in St Jago, the Verde Islands). He popped it in 'Spirits of Wine', which was indeed made by distilling wine to concentrate the ethanol. But you don't have to go to that trouble: the university has a special license to purchase swirling gallons of the stuff tax-free, so I can give you some for your spiders or fish.

Naturally, if you've been pickled in alcohol for many years, you don't look quite as fresh as you did when you were alive. I do rather like the faded ethereal look of the specimens. However, you'll want to document the colours of yours before they lose them, or it might make your identifications that much more difficult. Spiders lose their colour remarkably quickly.

You'll also want to make sure your containers are properly tight, or you'll get the ethanol evaporating and leaving your specimen high and dry (this is good neither for your specimen nor your mark). I can offer a range of tubes though you might find others you prefer.

The concentration of the ethanol is important too - 70% is recommended (in fact once you start looking into it, a lot of things are recommended) and I can make this up for you.

Looking after a huge collection must be a massive job: this blog at UCL details their 'Project Pickle' to revitalise the specimens they own. Don't say 'pickle' to a museum curator though, it's far too casual :) This is a serious business. The entire UCL blog is very interesting and I recommend a look.

Thursday 16 June 2016

Spider identification course

A peasant woman looking at some ballooning spider silk (for reasons currently lost on me, but probably to do with the fragility of life and impending death, that's art for you) in Chelmonski's painting 'Indian Summer'.

 If I ran a course I'd call it 'Sp- I.D.' But no-one would know what I was going on about, fair enough. I attended one this week in Shropshire, arranged by Manchester Metropolitan University. It was fundamentally about improving your identification of preserved specimens by using keys. So ideal to help me help you with your collections.

I discovered my pronunciation of some spider-bits had been a bit ropey (apparently it's cephalothorax with a hard c, and cry-bellum for cribellum). And I learnt a lot of interesting spider facts about their evolution, various types of silk, and strange habits. The tutors were both enthusiastic and knowledgeable.

I do think that I and the spider-students did very well earlier this year ourselves with the Collins key. We learnt a lot together. It was a steep learning curve.
 
But the good thing about this course was that I could finally ask someone experienced whether certain features were actually present or not - like the silk back-combing 'calamistrum'. When you don't really know what you're looking for you can start imagining things. It is the bane of the lone key-user.

A calamistrum - a cute row of neat bristles for fluffing up silk, sported by some spiders.

And it was good to get to the end of the key and be able to compare my identification with a confirmed name. It gives you a lot of confidence that you really are able to get somewhere. So I feel happier in my ability to help you now.


We were also shown the following:

The Arachnologist's Handbook by Tony Russell-Smith, Geoff Oxford and Helen Smith - it's £10 (free if you join the BAS) and includes lots of information about collecting, preserving and identifying. It also has an improved version of the Collins Spiders family key.

The Spider Bible is this one: Roberts' "Spiders of Great Britain and Ireland". It's very expensive and a bit over the top for your beginner. But the colour plates in volume 2 look amazing. Maybe we'll get a set one day.

This website: Araneae - Spiders of Europe is one I was unaware of before, and it's full of lovely clear close-up photographs. Probably best used once you've got some idea from the Collins key.

And this one: Les Araignees de Belgique et France has excellent photos and diagrams of the reproductive bits that you need to look closely at to to distinguish many species. I think this will be very useful to future spider-collectors.

Also I've just noticed a link to this, the Provisional Atlas of British Spiders v1, by Harvey, Nellist and Telfer. It has a map for each species and a bit of detail about each. There's also a good introduction which might come in handy for your monograph.


The spider figure of the mysterious Nasca Lines, Peru. CC image by Diego Delso.


Friday 10 June 2016

Snails as a resit suggestion

 I saw this photo of this 4th century mosaic (in the Basilica of Aquileia, Italy) and it reminded me that snails could also be a good choice.

CC image by Sailko

You don't have to use (and kill) "fresh snails" if you don't want to, although you can make life more difficult for yourself if you use very old abandoned shells, as they will have lost their colour and are more likely to be damaged - much harder (if at all possible) to identify.

Some of the snail collections this year (I thought) were really good - their creators had been out to a variety of habitats and so found a good number of species. Others weren't so good because they only contained a handful of species (submitting many examples of the same species isn't going to get you extra points).

I've been surveying plants at a local limestone grassland and I keep coming across snail shells (and live snails) - species you won't find in your garden.

Some species are a lot easier to identify than others. But once you've got a range to look at, you start developing an understanding of what the identification guides are getting at. There's one online at BRERC but I've found it much better to use it in combination with other resources (see here)
as some groups are particularly tricky and a range of descriptions to compare is helpful.
I've also bought a copy of this older book by Kerney and Cameron which you'd be welcome to use - the names can be a bit different but you can cross-reference with Cameron's newer book (which I also have a copy of).

You could come in and view your specimens under a dissecting microscope - it's useful to see the fine sculpturing of the shells. Or otherwise you will really need a handlens for the smaller species.


Thursday 9 June 2016

Asteraceae as an idea for a late collection

I walked round campus yesterday collecting grasses. There were many. I had a go at identifying some but perhaps due to being in recovery of some germ, I wasn't getting very far. Nevertheless, I feel that there must be enough species even without the annoyingly difficult ones, so that grasses could still make a good collection.

My other thought was that Asteraceae must also be possible. Not all of them have flowers at the moment though, which is annoying. But some Asteraceae are a lot more identifiable without flowers than some grasses are with them. So even those might be allowable in your collection so long as they had sufficient features to be identifiable (those features are what you'd want to explain in your notebook).

Pineapple mayweed (CC image by Krzysztof Ziarnek)

These are some species of Asteraceae I've seen recently:

Ragwort
Smooth sow-thistle
Ox-eye daisy
Daisy
Bristly ox-tongue
Dandelion
Spear thistle (I've seen no flowers)
Pineapple mayweed... allegedly smells of pineapple but it just smells peculiar to me
some sort of other mayweed / chamomile
Nipplewort
Lesser burdock (no flowers, but very distinctive leaves at the moment)
Groundsel
Rough hawkbit (with strange forked hairs)
Mouse-ear-hawkweed

That's 14 species and I'm sure there must be plenty more, as there are many things with yellow dandelion-like flowers about at the moment (they just require patience to investigate). You'll need a flower guide with good descriptions - I like Francis Rose's 'Wild Flower Key' and you're welcome to borrow a copy. There are keys in it to the Asteraceae - so if you showed how you'd used them to identify your plants, that would get you many marks.

Again, if you try to visit a range of habitats (for example, go to the seaside or a bit of limestone grassland), you'll be more likely to find a few more species.You can press them easily under some books, but make sure you change their newspaper and leave them long enough, so they dry out and don't go mouldy.

If you'd like some help, please do email me. 

Wednesday 1 June 2016

Grasses as an idea for a late spring collection

I had an extremely quick mooch about looking for grasses between the car park and the office this morning. I think I found eight grass species with flowers, certainly seven. It was raining when I left the house so I didn't hang about, but I know there are at least two more in the verges there. And down the road there is some limestone grassland and I know there's another species or two there. Plus I've recently seen three more species in a wood. This comes to 15 species already. Fifteen. So if you're looking for some inspiration, grasses could be the thing.

Image by Matt Lavin.

These are my basic grass-collecting tips:

- Ideally visit a number of different habitats - roadsides, woods, the edge of arable fields, meadows, different geology (acid, calcareous), next to the seaside (eg salmarsh, sand dune). That's how you'll get lots of species. And the more species the better.

- Pick stems that are flowering.

- Pick them all the way down to the ground.

- If the leaves at the bottom are different, make sure you get those and make sure you keep them with the right specimen. Attach a label so you know where you got it from. And make some notes in your notebook about where you are. And maybe draw a picture of the grass in situ.

- It doesn't matter if you fold them up to get them into your plastic bag - you're going to have to fold them to get them on a page unless they're very small. But try to fold them cleanly just once or twice.

- You can store them in the fridge (with the bag all tied up) - but try to identify them as soon as possible or the ligules (an important identification feature) may deteriorate.

- Don't forget to write down your thought processes and draw some pictures in your notebook.

- As soon as you've identified them, get them pressing. You can see details here, it's very low tech but it works fine.

I'm not saying they're easy, they're not. But at least you should be able to find a good variety. And that's a good start. You can read some more via the 'Grasses' link on the left. But please do come and see me with a few specimens, and we can look down the microscopes and figure out all the important grass features together.
Wood melick, by Gilles San Martin. Mmmm wood melick, I like this one.
Some of the species I've seen recently:
Wood millet, Milium effusum
Wood melick, Melica uniflora
Cock's foot, Dactylis glomerata
Timothy grass, Phleum pratense
Annual meadow grass, Poa annua
False brome, Brachypodium sylvaticum

Tuesday 31 May 2016

For those that must resit...

I'm thinking maybe grasses might be a good thing to try this time of year. I know, you may think them dull. But they're not, they're very varied. And as with everything, so much better when scrutinised under a lens.

And perhaps even the Asteraceae, I've seen a few recently.

I'm going to see if I can collect a few tomorrow to test feasibility. Watch this space.

Friday 13 May 2016

Some tips for your field diary

You might think 'oh, the field notebook is only worth 15% of the mark'. But that would be a mistake. The field notebook underpins everything. It's the place where you record details of where and when you went out collecting and what the habitat was like there (essential information for your labels). 'It's also a place to show the thought processes behind your identifications (important in convincing someone you have your 'what' correct - so it has some impact on other parts of the marking).

Whoever's marking your work will want to see and believe that you took your notebook with you. So imperfect handwriting is fine. They definitely don't want to see everything typed up. They're not even after complete sentences. It's got to be legible and coherent of course! But they're not expecting anything especially neat. Don't worry if you drop it in the mud. In fact, go on and drop it in the mud, it'll give it an air of authenticity.

So, what sort of notebook might it be? Obviously that's up to you. But I'll tell you what I like to use, to give you some ideas:


This is my notebook from a course I took about grasses and sedges. It's got a sturdyish cover to withstand abuse from rain, mud and being shoved in my bag. It's ring-bound, which I like, because I can fold it back to make it easier to write in and there's always space to stick in photos and extra bits of paper.

It's A5 which allows room for notes and drawings (I find A6 a bit small but you might like it). You're traditionally supposed to use a pencil in a field notebook - it keeps writing in the rain, and it writes at whatever funny angle you've got it. I hear you can buy notebooks of waterproof paper but frankly I think you're better off staying indoors if it's going to rain that hard.

And it's blank, which I prefer because you can make little sketches and maps, and write wherever you like in whatever direction you like (without being dictated to by the control freaks that make paper with lines).

Here's a page that might have been done in the field (below). You can probably do better than this by the way.


You can see I've put down:
- the date.
- the name of the place.
- the type of habitat it is.
- the reason I've gone there.

- I've taken a photo of the plant in situ (which would be printed out and stuck in later). A sketch is just as good if not better as you can accentuate / annotate what you think's important. If you're collecting twigs, it's quite good to record the general outline of the tree, as this will help with identification.

- I've written down the grid reference and added a map.

- I've noted what the habitat was like at the spot where I found the plant, and given it a six-figure grid reference. With some groups it might be appropriate to note the substrate (eg ash bark or rock), or how shaded or damp it is, etc.

- I've given the specimen a temporary name ('specimen 1') - and I would attach a little label to the specimen somehow. There's nothing like getting home with a big bag of specimens and not knowing where on earth any of them came from.

- I've drawn a few rough sketches of what I thought the important features were 'in life' - the way it grew in a big clump and the distinctive way the flowers hung. These aren't things you'll necessarily remember when you get home, so you should try to do these in the field. It's also important to remember an indication of scale (something I forgot in the example above).

Such sketches were highly approved of in last year's notebooks and will get you extra marks. It can be particularly important if you're collecting invertebrates, because their behaviour won't be evident when they're dead and stuck on a pin. If you're collecting a spider, a photo of its web (if it has one) is useful to support its identification. If it's lichens, you should note what species of tree it's on, or perhaps that it's on earth or stone.

You might be able to key your specimen out while you're still in the field (although that's going to be pretty impossible with some groups like beetles). But it's often hard enough to juggle the specimen, a pencil, a notebook, an id guide, a bottle of juice, a bag, an anorak you wish you'd left behind, a snack, and a load of pots or envelopes or labels. So you may want to attend to some or all of the detailed identification at home. But as this is a 'field notebook' it's important that not all your notes are made at home.

And your notebook is also a very important place to document the thought processes behind your identifications. But I'll cover more of that on the pages that relate to your specific group of choice.

I've written some more recent thoughts here.

Also you might like to look at these pages that show previous students' books.

Thursday 28 April 2016

Identification of waxcaps

Hygrocybe coccinea
If I had to pick my favourite group of mushrooms (it's not a decision that comes up often, I know) - then it would be the lovely Waxcaps (the Hygrocybes). They're usually brightly coloured, they have a strange texture, and they've beautifully wide-spaced gills. And not only do they have this rather other-worldly look, some species are ecological indicators of long-undisturbed habitats, and are being recognised as useful highlighters of natural spots worth conserving. So note where you find them.

There are plenty of resources on the internet to help you with identification (it seems waxcaps have many fans):

The UKEconet project has an extensive guide, which includes photos of other grassland species.
The Somerset Environmental Records Centre has a key to Somerset species which might be useful.
And Aberystwyth University has a whole 'waxcap website', which includes an online key (sadly with no pictures).

Monday 25 April 2016

Collection reflection 2015/16


All the collections are handed in, and many of them look amazing, and people should be really proud. I was really impressed at the amount of work that has evidently gone into some of them, from the range of specimens and the careful labelling, to the books full of detailed notes and descriptions (often cheeringly enthusiastic).

I think where they're not so good, it may have been because of underestimating the time it would take to do the project, leaving too little time on the collecting or identifying. Or that people had not added regularly to the notebook to provide evidence for all their traipsing about and collecting and identifying. When I looked at the collections without a decent notebook, I thought, 'Did they just pluck these names out of the air?' Also sometimes the labelling was pretty rough, and I'm sure that was sheer lack of time management, because who wouldn't want to get a few easy extra points for a neat 'who/what/where/when' label if they had time?

But some general thoughts - any collection is going to be better if you can get out to a wider range of habitats, because then you'll find a wider range of species - I'd always recommend doing this if you can.

And you need to pick your group carefully - some groups present particular inherent difficulties of collection. I'm thinking groups like mammals (where you'll have to pick specimens up opportunistically over a long period of time, not that anyone picked those this year) and moths (where winter and limited equipment makes things more difficult - I know some would-be moth collectors had to change tack).

Conversely, some groups aren't so difficult to collect, but you do need to factor in time to come in and use the keys to identify them. I'm thinking things like spiders and mosses. If you're like me and enjoy the microscopes and the little buzz of triumphing with the keys, this is a pleasure though, not something to be feared. It was really nice to see other people getting into this. And remember you can start as early as you like and I'm always happy to help you. It's true that much was achieved by all the people that brought things in in the last few weeks, but you're bound to get more one-to-one assistance (and a head start) if you bring a few specimens in earlier.

I've made a little table summarising (what I see as) a few pros and cons of the different groups:
 
I'd be happy to hear any feedback to help me help students better next year - please let me know.

Tuesday 12 April 2016

Spider drawings

With one week to go before handing in, I realise this is a bit late for most arachnid fans. But perhaps it will be useful for the future.

I've found an online British spider key written by L Watson and M J Dallwitz. There's a conventional dichotomous version that looks similar to ones in the books, but also an 'interactive' key that allows you to pick out various characteristics you do know, and ignore the ones you don't. The interactive key requires you to download a little bit of software and has much information (it also prioritises the most important characteristics). I've not used it yet with a spider but I think it looks quite hopeful (even in my beginner's stage).

Blackwall's drawing of Dysdera crocata, borrowed from here.
What caught my attention this morning are the drawings of species, which you can see without going through the key by clicking the different family names on this page. They're by John Blackwall, who was an arachnologist working in the 1860s (they come from his books on "A history of the spiders of Great Britain and Ireland"). The taxonomy has changed since his time, but the authors of the key have done their best to associate the drawings with contemporary names.

Of course not every spider you might like to see will be there. But at the moment it's useful for me to see different illustrations of the species, to try and build up a mental picture of them. The colour illustrations in the Collins guide are nice, but with their splayed stance and crazily overlapping legs you don't get a very good idea of how the spiders look in real life. Blackwall's illustrations are rather jaunty.

But for more conventional 21st century illustrations, you can see photographs of reliably identified spiders on the Spider and Harvestman Recording Scheme website (scroll down on the species page as there may be many photos at the bottom).

Monday 11 April 2016

Lichens for last minute panickers

Ramalina farinacea, a surprisingly fluffy (fruticose) lichen that can be found on a tree near you. Image by MMParedes
On Friday I had a little wander round campus looking for lichens, in advance of meeting a student coming to use the microscopes to identify her specimens.

I expect no-one sensible would leave collecting things so late. But should you be in such a position (being charitable, there are many reasons why you could be, maybe your previous efforts have gone hopelessly awry) - then I think lichens could be a good choice. You're still going to have to make a good attempt at your log book to show how thorough your identifying is. But you won't have problems of preservation for one thing. And with a lens or microscope, some species are identifiable relatively painlessly, especially if you can narrow them down by habitat (i.e. the hardcore selection that can tolerate urban twigs).

I managed to find eight species pretty quickly. And the student had six others I didn't have, also collected around Bristol. Some were a bit of a pain but we were reasonably sure about 90% of them. Fourteen species wouldn't make an unimpressive collection.

We used the FSC fold-out twig key to start with, and combined this with the keys and pictures in Dobson.

But you could also try the NHM's online key or this downloadable key to lichens on trees.

Then there's always Alan Silverside's website for more photographs and descriptions, once you've narrowed things down. I've also been looking at Jenny Seawright's Irish Lichens website (also with photos and descriptions) and Mike Sutcliffe's British Lichens site (mostly photos).

But do please come in and use the microscopes - it's so much easier to see what you're looking at, and in any case the lichens are so lovely magnified.

I'm not saying lichens are easy, they really aren't. But if you collect them in the city, it's likely that they'll be among a select group and that will make identifying them a bit easier.

(And for those out of town, I've found another online key.  Brian Eversham has a key to heathland lichens but this is only for lowland species.)

Wednesday 6 April 2016

Spider eyes and ID

I've recently returned from the expedition to Cuba. And guess what I did there... I held a tarantula. I'm very proud of this. I feel that spiders and I are now better friends. It wasn't ENORMOUS but it was a good handful. I liked it so much that I insisted on holding it three times. In the end it relaxed quietly in my palm while I casually spoke to people. So this new familiarity helped me the other day when Student A arrived to identify his specimens (any spider looks like tarantula under a microscope so it's best to be prepared).

Wolf spider by Thomas Shahan
We found the main dichotomous keys difficult. It would have been better if we could have turned to an expert arachnologist to explain what was being got at. But as lone neophytes we found the lateral key in the Aidgap spider families key the best place to start. To avoid tears you may want to do the same. After finding a likely family we then went to the Collins Guide.

I learned three important things. Firstly, that a pickled spider may be helpful because it's still, but otherwise it's an alive spider that can tell you many more useful things, and you should have written those things down when you found it. Identification will be greatly more likely if you can authoritatively say something about a spider's habitat, behaviour and web or lack thereof - all these things feature in the keys.

Secondly, that the arrangement of a spider's eyes is very useful in its identification, -  this would be a critical thing to observe and draw in your notebook.. The wolf spider above has two big headlight-style eyes at the front, two offset towards the back, and a curious row of four small eyes below - just like the wolf spider Student A found. Doubtless the big front eyes are an adaptation for seeking out prey. But what's going on with those four small eyes? I feel like i want to know more about spider eyes. I'm not sure that's something you hear every day. But do most people even know that most spiders have eight eyes?

Thirdly, it's very likely that you're only going to be able to get so far with the keys - distinguishing species usually comes down to very careful observation of the reproductive bits of adult spiders. That feels like pretty advanced stuff and on small specimens such things might be too difficult to see at all. I felt we could discount some options on grounds of habitat / geography / rareness instead. But often we were still left with a choice and it would have been dishonest to pick one over another. I think you need to make clear in your notebook your decision making process for either stopping at the Genus, or pressing on to a particular Species. Spiders just are difficult. I think the person marking your collection will have to acknowledge this.

Image by Hans Hillewaert
This is Dysdera crocata, the woodlouse-eating spider, one of A's finds. We were able to name it to species level because of its size - ours was female with a body of 15mm, so could only be the species crocata. This was a satisfying moment after all the previous pain. Dysdera has (apparently) only six eyes - they look like this:

Image by Patrick Moran.

We were also caught up in looking for cribellums and calamistrums - the lovely words of the new terminology amused me even if we had difficulty finding the things. I'm quite sure though that the more spiders I look at, the clearer all these things will become. It just takes effort and time. (Which is why you shouldn't leave things until late. This is very late in case you were wondering.)

If you want spider-related reading, I've just found  Rod Crawford's Spider Myths -  much for the new spider fan to enjoy, and much of it touches on the difficulties of identification. You can see all his arachnologist gear and read about his collecting exploits here, too. Or you may prefer the blog of the Spiderlord, who is based in the UK. He's pretty annoyed about our eight-legged friends being misrepresented in the media.

Friday 11 March 2016

Successes in beetle identification

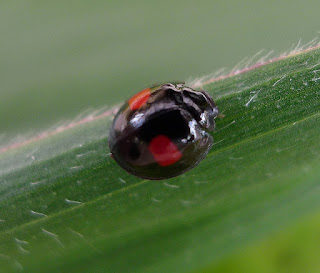
Kidney spot ladybird, as seen in OJ16 this week. It's a beetle too. CC image by GailHampshire.

Yesterday afternoon, student B and I had a go at identifying some of her beetles. It really was a triumphant success and she kindly said she felt a lot more confident about the process. I had a very pleasant afternoon and I think we both felt the geeky satisfaction of tracking a specimen through the keys and coming out at the right answer.

However, I thought I would mention here that this was not a speedy process. I've done some beetle i.d. before and so I was able to explain the terminology as it came up, pointing out the different parts of the beetle's body and showing her the classic beetle dichotomy of Crossed vs. Uncrossed Epipleura. So this speeded things up for her. But in three hours we identified three specimens. Yes this included faffing about finding microscopes, pins, printing off keys and chatting about other things. But you should still be aware that (at least to begin with) identifying your beetle (or spider for that matter) is going to take time. Do not leave things until the last minute.

Besides, we were enjoying the process, looking at the amazing detail of the beetles down the microscopes - they were surprisingly hairy, or stripey-lined, or with massive jaws, or with crazy antennae. So it was a pleasure to spend the time looking at them. Please do come and use the microscopes to examine your species, and I am only too happy to go through the identification with you. It's really useful to have two pairs of eyes to judge some of the characteristics.

We started off each time with Unwin's guide to families:


B's first specimen was huge, so much so that we initially tried to convince ourselves that the key was taking us towards the elbow-antennaed Lucanidae (stag beetles). But reason and logic prevailed. The short elytra (wing covers) led us to the Silphidae (burying beetles).

The extremely philanthropic Mike Hackston has an illustrated key to the Silphidae. And once we had got down to the right genus, his key for Nicrophorus led us to the answer: Nicrophorus humator. Fair enough, with a common species like this one, you might have been able to pick it out of the photos in a general insect guide. But you wouldn't have gleaned useful beetle-observing skills along the way and you might not have looked closely enough at the details that distinguish it from similar species.

CC image by Laisverobotams.
You'll see this species (the Black Sexton Beetle) has short elytra that don't cover the tip of its abdomen, and they look as though they've been cut off, straight across. It's got rather distinctive clubbed antennae too, and they're orange in contrast to the rest of its black body. We were rather taken by the furriness of the beetle's underside. This wasn't mentioned in the keys but we were wondering if it had something to do with the creature's lifestyle. This isn't a sweet little beetle with genteel habits. It's called a 'sexton' beetle because these seek out dead animals and bury them, laying eggs on the corpse. Some species eat fly larvae - and B found this example in a fly trap.

Our next specimen also had short elytra, showing even more abdomen. But its antennae were quite different. We used Unwin's key to put it in the Staphilinidae family - this contains about a quarter of British beetles! but luckily this species is very distinctive and we felt justified deferring to this excellent Watford Coleoptera Group page confirming its size makes it impossible to be anything other than the Devil's Coach Horse (Ocypus olens). It does seem beetles get all the best names.

The Devil's Horse Coach gets uppity. CC image by Galway Girl.

Finally we chose another black beetle from B's collection. It had long thready antennae, elytra that covered its whole abdomen, 'trochanters' underneath, and five tarsi on its front, middle and back legs. This made it a ground beetle - within the family Carabidae. Once again the keys generously provided by Mike Hackston were invaluable.  By steadily working through questions about the shape of its various parts, counting stripes and squinting for the existence of tiny hairs, we were at last able to confidently name it Pterostichus niger.

CC image by AfroBrazilian.
To the untrained eye little black ground beetles are pretty indistinguishable from each other. There simply isn't enough detail in a general insect spotting guide to be sure you've matched a species correctly - with beetles you have to be brave and attack the keys. But (as we did) you might find you enjoy it. You might get a little buzz out of solving the puzzle. And each time you do it, you'll get more familiar with the features you'll be looking for.

Naturally we recorded all we were looking at as we went along, drawing little sketches and writing down the reference numbers of the keys. Not only will this get you some marks for your notebook, it'll be a good reminder of all your previous beetles' features when you come to your next specimen.

A little note: you're welcome to come in whenever the university's open and sit in our lab. But just to say, I'm away on an exotic field trip for two weeks and will be back after Easter. I know. It's a hard job. And then you have three weeks to finish your collections. Let me know if you'd like my assistance and when.