Showing posts with label preservation. Show all posts

Thursday, 18 August 2016

I love things in jars

You are always welcome to visit the collection of Things In Jars in OJ17. We haven't got quite as many as the Natural History Museum in London: they have 27 km of shelves ( you can go on a tour). But our collection still represents a wide range of creatures (including even some plants). I have little idea about the provenance of many but I do like to wonder how the more exotic ones might have ended up here.

CC image by Mads Bødker

You can preserve creatures in alcohol for a long time. Charles Darwin used the technique when he was on the Beagle in the 1830s, and his specimens still survive (here's an octopus he caught in St Jago, the Verde Islands). He popped it in 'Spirits of Wine', which was indeed made by distilling wine to concentrate the ethanol. But you don't have to go to that trouble: the university has a special license to purchase swirling gallons of the stuff tax-free, so I can give you some for your spiders or fish.

Naturally, if you've been pickled in alcohol for many years, you don't look quite as fresh as you did when you were alive. I do rather like the faded ethereal look of the specimens. However, you'll want to document the colours of yours before they lose them, or it might make your identifications that much more difficult. Spiders lose their colour remarkably quickly.

You'll also want to make sure your containers are properly tight, or you'll get the ethanol evaporating and leaving your specimen high and dry (this is good neither for your specimen nor your mark). I can offer a range of tubes though you might find others you prefer.

The concentration of the ethanol is important too - 70% is recommended (in fact once you start looking into it, a lot of things are recommended) and I can make this up for you.

Looking after a huge collection must be a massive job: this blog at UCL details their 'Project Pickle' to revitalise the specimens they own. Don't say 'pickle' to a museum curator though, it's far too casual :) This is a serious business. The entire UCL blog is very interesting and I recommend a look.

Tuesday, 20 October 2015

Relaxing moths, and mould


I happened across this document this morning: How to make and use spreading boards for insects, by Alice Gray.

It's pretty ancient, but moth pinning isn't really one of those hi-tech 21st century things, so I think you might still find parts of it useful.

I've heard a couple of people bemoan their moths going mouldy - she uses some toxic-sounding chemical which was probably considered fine in the 1940s. But I think you might benefit from taking her advice about relaxing the moths - that only 24 hours in the relaxing chamber "should bring the driest specimen to a working condition." Prevention would be better than cure - so try to keep the humidity high for the minimum time, and then keep them dry after pinning.

That isn't tackling the mould issue if it already exists - but I've been trying to read up about it to find something that will work without gassing you in the process. I've read about using cloves / clove oil, so that might be something to try. 

She gives very detailed advice about pinning (you might even find it too detailed) but I did notice a few little insider tips such as:

"With the tweezers remove a specimen from the relaxing box, holding it firmly by the thorax. Blow on it gently from behind. If the wings flutter slightly, the specimen is soft enough to spread."

also that,  "When filled, the spreading board should be stored in a warm airy place while the specimens dry. If the specimens have been previously dried, and relaxed, this will require from two days to a week, depending upon temperature, humidity, and the size of the insects. If fresh specimens are being mounted, they will take about three weeks, skippers and large moths not less than four weeks. In extremely damp climates forced drying in a slow oven may sometimes be necessary. It is never advisable to remove specimens from the board on a rainy day."


Tuesday, 29 September 2015

Resin as a preservation technique

I can't find any copyright-free resin pictures! so here's a fossilised spider preserved in natural resin -i.e. amber. CC image by Elisabeth.
Several people have asked me recently about preserving their specimens in resin. It's not the traditional thing for taxonomic collections. But if it does what it needs to do - i.e. preserve the specimen while still enabling you to examine all its important and distinguishing features - then it's probably hard to argue with.

I can only imagine attempting small things like beetles and spiders. Little floaty seaweeds in resin look great in my imagination but the technique wouldn't be very practical for anything much bigger. (and you probably want your entire collection to match aesthetically). I can see resin's appeal because spiders do tend to get all scrunched up in alcohol - perhaps it's easier to spread all their legs out in resin(?).

The main issue seems to be - does it still allow you to see the fine detail that allows you to show you've identified it correctly? If you can get this to work, then that's excellent. But it might take a bit of frustrating experimentation. Followed, hopefully, by success and general elation. But perhaps by you getting cross because you've ruined your specimen. So perhaps don't try things out on something you've only got one of.

I've got a tiny bit of experience with resin, but not with setting creatures in it (it's Art, innit). So I do know that you'll probably want 'crystal resin' because that's completely colourless. The stuff I used was cheaper but practically opaque. You have to buy a tin of resin and also a tiny bottle of stuff which reacts with it to make it set (the catalyst / hardener).

You'll also have to think about molds.  I bought a few for my artwork but they weren't cheap, and most of the commercial shapes were far too cutesy. In the end I improvised something I could get for free, but they sometimes got hopelessly stuck, which wasn't ideal.

I also know that resin heats up a bit when it cures, and that can lead to problems with specimens. The only student I can remember that used resin found his spiders went a bit shrivelly. But perhaps this was because they contained moisture, perhaps they could be freeze-dried first? And I believe you can get a problem with 'silvering' which might be related to the shrivelling, when a gap appears between your creature and the resin. I don't know how it will affect the colours of your creature - perhaps that depends what it is.

I also know that resin really stinks and you'll have to find a well-aired place to deal with it (I would suggest the labs but we've not got a fume hood - other people's labs do, but you'll have to fit round the classes).

I found this video on youtube which is interesting because they essentially make their own mold, based on a cut bit of perspex. But they do have an awful lot of bubbles in there (despite their insistence otherwise). And I'm not totally convinced by the opaque edges. And the insects are all curled round. "Oh" I thought, "perhaps you could pin them first." But then if you're going to pin them... why not just pin them, not resin them (not that that would apply to a spider). Don't forget you've got to attach a label somewhere too.

I spotted this guide by Rhys Brigida who loves encasing spiders in resin. He's American, so everything's dollars and ounces, but it should give you some inside information from someone who's tried it with spiders (albeit mostly large ones).

So. This could be worth some experimentation, and much reading around on the internet will probably help. But only if you're feeling super keen, because traditional methods do work and might be less aggravating. I think it might drive me a bit mad. A big question will be - do you have the extra time to get good at it, and will it be worth the possible extra marks if you can do it well? Remember the important part of this assignment is the identification, not just the presentation.

But I do wish you the best of luck if you want to try.

Thursday, 24 September 2015

Entomological suppliers

CC image by Anaxibia.

 I was thinking it might be best to be like the BBC and not openly advertise any particular companies. But let's face it, if you want entomological pins or something similar, you can't just pop down the supermarket, your options are limited. So I'm going to point you at a couple of the bigger more obvious companies.  But "other entomological suppliers are available."

 Watkins and Doncaster

and Anglian Lepidopterist Supplies

both stock all sorts of pins, boxes, lenses, nets, scalpels, beetle glue, you name it. The Watkins and Doncaster site is easier on the eye, but they don't include VAT until you check out, so you only think it's cheaper until then.

Something I've discovered recently and am consequently evangelising about is this type of very light forceps - they help you pick invertebrates up without damaging them. They're not exactly cheap (I got mine somewhere cheaper on ebay... Dutch ebay actually), but I have found them useful.

I do have some glass vials you might like for collecting / display, and don't forget that I can make you up some invertebrate preservative (70% ethanol, 10% glycerol and 20% water). I've also got ethyl acetate if you want to make a killing jar. Also little crystals of naphthalene (moth balls) to put in with your insects to deter nibblers. And plenty of spreading boards you can borrow if you're doing moths.

Wednesday, 23 September 2015

Presenting your lichens

Graphis scripta, not known for legibility. CC image by Ed Uebel.

The packet method is traditional for long-term storage of lichens. So you could hand them in in packets arrayed one behind the other (in taxonomic groups) in a box - like this picture of a moss herbarium at Yellowstone National Park. You can make the packets the same way as the ones you used for collecting. This is the traditional style preprinted envelope I used for handing in samples on a lichen course I attended. This has got more than the bare what, where, when and who information,  - but as long as you include at least those either on the envelope or a separate label, you'll be fine.


But lichens are aesthetically pleasing and most if not all students who've collected them in the past have gone for a more open display. You could put them in a single clear-fronted case, or in lots of little boxes, or perhaps fasten them to a piece of mountboard, or make some kind of more naturalistic 'lichen diorama'. It depends how sober or creative you want to be. I just can't find an example of such a thing on the internet, which is distressing, and all previous lichen collections here have been proudly taken home by their creators. I look forward to taking a photo of yours.

And this being a taxonomic collection, you should make efforts to arrange them taxonomically in your display. But lichens are a bit strange because they're a symbiosis between two types of organism - a fungus plus an alga or cyanobacteria. Taxonomists have named and arranged them according to the fungal part of the relationship. If you want to know what the other part is, Dobson often says. It can be useful to know for identifications, because one of the photobionts, Trentepohlia, is orange not green when you scratch the lichen's surface.

When you're learning to identify lichens, it's really helpful to divide them by form: crustose, squamulose, foliose, fruticose... but those aren't taxonomic divisions and your display shouldn't be organised on that alone. It would be better to include the name of the family, and divide them like that.

I recommend using the Natural History Museum's Dictionary of UK Species to ensure you have up-to-date names and the correct family information.

If you have any questions, please do come and ask me, and bring your specimens!

Long tailed tits frequently use lichen in their nest building. CC image by Alan Shearman.

Wednesday, 19 August 2015

Identifying mosses and liverworts

Mosses can seem daunting to identify - and some mosses are definitely harder than others. However, some can be quite distinctive, and there are common species which can provide success and encouragement. (Some mosses have stupidly small leaves and should be put somewhere safe for when you're feeling more bryologically confident).

The FSC (in fact, specifically Martin Godfrey, my erstwhile Moss Tutor) has produced a little fold-out photo guide to mosses and liverworts of towns and gardens. It's only £3.30 so won't break the bank. The photos are really good as they capture the different forms of these common species rather well. It would be an excellent start to get your eye in (although I am obliged to say that you should still examine your finds under a microscope for certainty and the sheer pleasure of it).

You should also check out the British Bryological Society's website, where you can download for free the field key from their recent (lavishly illustrated) fieldguide. There are also links to all the species descriptions and photos from the book. I have a hard copy you can look at - as a budding bryologist you might eventually like to order one from here. I've had some success using this in the field and I do recommend it, although the number of species is rather off-putting to the beginner, and the binding is so flimsy that mine's fallen apart already. And I'm sure there are some issues with some parts of the key. But it's certainly worth trying as the key is supposed to work with just a hand lens.


So, the above field guide is very nice and glossy, but sometimes its lack of detailed illustrations leaves you wondering whether you could really ever know whether your identification is right - at which point Dave M and I always like to turn to one of the Moss Classics, E V Watson's 'British Mosses and Liverworts'. We have a couple of copies of this and there are a couple in the library. It was first written in 1955 and revised twice - but it's still really useful (though you may need to look up the most recent species names). It has lots of clear drawings of what you'd see under a light microscope (the cell structure of moss leaves is very diagnostic, and may I say lovely). If you want, you can get a second-hand copy reasonably cheaply. You are very welcome to come to the field centre and use our copies along with the microscopes.

The hard core might also turn to A J E Smith's ' The Moss Flora of Britain and Ireland' - we have a copy of this too, but it makes my head hurt.

PD image by Terrific
There are some habitat-specific resources you could try - there's a booklet you can print showing 'Mosses and Liverworts of Town and Garden' on the BBS website, and we have a book called 'Mosses and Liverworts of Woodland' (by Alan Perry). These describe whole plants, which can be a useful way in, but for this assignment you need to prove you're doing more than just matching pictures with your specimen. So you're going to have to face one of the keys above at some point.

At first it can be tricky to even work out which features you're supposed to be looking at (and there's a certain amount of terminology - though the BBS guide does try to limit this) - so do seek our help if you'd like.

Here's some information on collecting and labelling them.

Collecting seaweeds

Gaugin's 'Seaweed Gatherers'. You probably don't need this much.
I wasn't actually around in the Victorian era, but I am a fan of the writings of the Victorian naturalists. They're often full of very practical advice. I'll refer you to W H Grattan (writing in 1872) for some tips:

At once then, to the shore, but not to the sandy shore, for only useless decayed rubbish, or here and there some straggling Zostera marina will be met with. The collector must away to the rocks, and search carefully every pool he meets with, from a little distance below high-water mark, and so on down to the water's edge, always remembering that it is better to collect while the tide is receding than as it is coming in.

He describes how the red species will be found mostly on the lower shore - they are adapted to the lower light levels - but that you may also find them growing on the stems of kelps that have been washed up. 

When you collect your specimens, you want to take enough of the thallus (the entire seaweed) to make sure you can identify it - include both the leafy bits - the blade, and the stemlike bit - the stipe. The Official Guidance for the assessment suggests you also include the holdfast, the rootlike bit that holds on. However, I've also read that you should definitely leave this because it will enable the plant to grow back.

My advice is to be sensible - nobody is going to mind if you take a piece of bladderwrack when the species is carpeting the beach. And ideally you should always seek the permission of the owner - they are likely to be perfectly happy to allow you and indeed may be very interested in your findings. I know - all those years of beachcombing as a child... you never asked for permission and it might seem absurd... but I'm just giving you the information so you know the official line. I've written a page about collecting on the seashore here.

While in the field, don't forget to make careful notes on the specimens' location and habitat. You'll need to know which one you got where - you could put them individually into labelled bags, or make some sort of label to tie on (they'll have to be waterproof, remember).

Back home, the specimens have to be attended to straight away. Grattan says:

Beginners should be cautioned against the error of bringing home too many plants at a time, or lose choice specimens which will decompose unless they are attended to before night. The first thing is to empty the bag into a basin of sea-water and select the best plants, giving each a good swill before placing it in another vessel of clean water. Get rid of rejected plants at once.

He then describes how to mount the specimens - I have written some advice here.

Tuesday, 11 August 2015

Preserving and labelling your spiders

One of Louise Bourgeois' famous spider sculptures (CC image by AlejandroLinaresGarcia)
You will have realised that collecting spiders will involve killing them, and although this is not a nice thing, you should bear in mind that if you get serious about spiders, your records of them in future could help them out in general. I recommend reading Mark Telfer's page where he  discusses this in relation to beetles . You might also like to see the Field Studies Council's code of conduct for collecting invertebrates, and Holly Dillon's blog post about the subject.

The arachnologist him or herself can be identified in the field by the way their pockets rattle with little collecting tubes. I can provide you with a supply. If you want to bring your spiders home alive, then put them in different tubes, or you may find you end up with one, very fat, spider. You'll need to make a note on your tubes exactly where you found the specimen - this can just be a number that refers to the detailed notes in your field notebook.

After examining them live, you might choose to put them in the freezer to despatch them. After this you would add 70% ethanol to the tube to preserve them.

Alternatively, you can take ethanol-filled tubes into the field, and add your spiders straight to them. I can provide you with the ethanol as well.

(Spiders' bodies are much softer than an insect's, so they can't be pinned like you would moths and beetles. So they have to be kept permanently in ethanol. You will add your label inside the tube with the spider (so make sure you write it on good quality paper, with permanent ink).)

Next you can identify your preserved specimens under a dissecting microscope (please do come in and use ours). You really need to keep them immersed in the ethanol, or they'll dry out and shrivel up. Some important characteristics are actually easier to see under liquid like this. Jones-Walters' book has an illustration of a spider being supported by glass beads in a watch glass - useful for propping the specimen in any direction so you can see all the important bits.

The downside of ethanol is that the spider's colours tend to fade. So it's best to try to identify your specimens soon after you collect them - otherwise they may look rather different. It's good to make notes about obvious colours and patterns. It's also good to keep your pickled specimens out of the light to slow down any fading.

Here's a specimen I preserved on my course - on the right you can just see a little spider from the Lycosidae (wolf spider) family. The tube was only small, so I had to write on both sides of my label. Just make sure you include a minimum of 'what, where, when, and who' and you'll be fine.

On this side I have the location and grid reference (and also the vice-county), and a mention of the habitat (I found mine hunting on the bare earth of a mole hill). Then I've got my name as collector, and the date it was collected.

On the other side I've written my identification. I only had to go to family level but if you can identify the species that would be brilliant. (You won't have to put the Order - all your specimens will be Araneae, so it's self-evident). And then there's my name as the determiner (the person who identified the specimen) with the date.

I used a small slip of heavyweight paper (cut from an artist's sketch pad) and an extremely fine-nibbed archive pen (these can be bought in the SU shop, it's a size 0.05).

Remember, you want the most up-to-date version of the spider's name. The best way is to check it at the Natural History Museum's Dictionary of Species. Because you're dealing with an animal, you should really write its Latin name accompanied by the 'authority' (the person who first named it) plus an English name if it has one. For example,
Eresus cinnaberinus (Olivier, 1789)
Ladybird spider 

or if you're hand writing it, underlined:
Eresus cinnaberinus (Olivier, 1789)
Ladybird spider

Then you'll need to find a suitable way of displaying your specimen tubes... perhaps a little box with foam in the bottom and a lid. You might want to label the spots the tubes sit in.. so you can keep some taxonomic order (keep spiders from the same family together for example). Or put them in some kind of rack. You could go for that retro Victorian look, or something super elegant and modern. It's up to you. I might be able to find you some sort of box if you're really stuck.

spider in hand sanitiser gel. CC image by USGS lab
And a new idea: I've recently read about people storing all sorts of invertebrates in vials of hand sanitiser gel. This might be seen as new-fangled compared to the time-honoured ethanol / pinning methods. But as hand sanitiser is partly alcohol, it might indeed preserve them for a while (perhaps for a long while). So you might want to experiment with that - it looks rather aesthetically pleasing as the animals 'hang' in the vial, rather than falling to the bottom. I might have a go and report back.

Update: last year someone had a spider collection in sanitiser and it went mouldy. It was a shame. My advice is to preserve the spiders in alcohol as normal, and then transfer them to the gel at a date nearer the hand-in. I don't think the gel will penetrate the spiders' bodies well enough to preserve them alone, though it might be alcohol-y enough to keep them in once they're preserved. That is my advice.

People have also asked me about using resin, which I've seen done before, but can't vouch for its easyness. I think it will be difficult to be honest, and you could ruin your specimens.

I can provide you with some vials, and certainly with the preservative. You may find you want to buy some of your own supplies - if so, there's a suggestion of some companies here.

Pinning and labelling your moths

My former art tutor Janie George (alumna of the Slade, no less) has been inspired by moths.

I'll be honest - I've little experience of pinning moths, though I've done a little with other insects. So I will refer you to some of the experienced knowledge-sharers of the internet.

I'll assume you're starting with a dead moth, which you'll have despatched in the freezer or a killing jar. If you pin it straight away, it'll still be flexible enough to do so. Otherwise, you'll have to relax it first.

You'll need a sealable jar or plastic box - put some wet cotton wool or tissue in the bottom. If you can put a pin through the moth's thorax already, that's great. If you can't, that's fine but you'll have to improvise something else to raise them away from the water. They should be ready after 24 hours or so.

This chap has an excellently clear video on how to relax, pin and spread a butterfly (admittedly it's the most huge and beautiful butterfly, but the principles are the same). It's full of useful tips, he's very good. He even shows how to restore a damaged specimen's detached head to its body! But I hope things like that won't happen to you.

There's a similar video here from a man at Queensland Museum - same thing, but he's dealing with a much smaller butterfly (more like the size of your moths).

I also like the photos and detailed explanation of pinning on the Insects of Iowa website as an alternative to a video.

We have spreading boards of various sizes and entomological pins you can borrow. One thing I don't have is any ordinary pins for securing the paper strips. Eventually you'll probably want to buy things of your own - in which case I've written a page about entomological suppliers.

There are some little things to note:
Unlike with beetles, the pin goes into the centre of the moth's thorax.
The rear edge of the front wing is set at 90 degrees to the body.
The front edge of the hind wing is pushed just under the edge of the front wing.
You must leave the moth in place for a week or two to set.

[I'm not sure I particularly like the idea of setting all moths this way with their wings out - I mean a lot of them don't look anything like that in real life. But it's the traditional way and I'm probably fighting a losing battle to suggest anything different.]

Remember to keep a temporary label with your moth while it sets, to remind you what it is and where you caught it. Then it'll be easier to write your final label. You should check all the names you use with the Natural History Museum's Dictionary of UK Species as this will give you the most up to date version.

Then you could add labels underneath your moth as I've explained in the beetle section.
Or you could have just one label. The important thing is to include all the what, where, when and who information. Plus for moths, it's rather nice to include the method you used to catch it. I offer an imaginary example below. You might want to type and print yours.


On The Sceptical Moth website  you can see how they've staged a micromoth (rather as you would do with a tiny beetle) - and see how labels have been attached to the pins.

Next you'll need a box to put your specimens in. You can pay whatever for a special box from entomological suppliers (like these), but if you're not feeling flush, any box with a close-fitting lid will do. You'll want to put in some moth balls (tightly secured in a corner) - to put off live insects from eating your specimens! I can give you some naphthalene for this.

Tuesday, 4 August 2015

Killing beetles (sorry)

PD image by Emilian Robert Vicol
Mark Telfer has a page on his website where he makes a very good case for collecting (that is, killing) beetles - and your taxonomic collection, as a reference collection and way into entomology, is included under his argument. Of course this won't convince everybody but it gives a good scientific reason for those that decide to choose this group.

You might also like to read the Field Studies Council's code of conduct for collecting invertebrates, and Holly Dillon's blog post about the subject.

He also summarises the ways they can be dispatched.

Traditionally people used jars with laurel leaves torn up inside - the cyanide gas released naturally from the leaves kills the beetles. There are logistical problems because you want to keep a note of where you found each specimen, so you need to keep each specimen separate, but still let in the fumes.

An alternative is to use ethyl acetate (I have some you can have). You can set some plaster of paris in the bottom of a jar and let a little of the solvent soak in (or use a paper tissue with a few drops on it). Again the beetles will be overcome by the fumes (but do leave them in long enough as it's quite horrible to find the beetle you're pinning start to squirm). An issue with an ethyl acetate killing jar is that it really needs to be glass, as the solvent will melt plastic. But glass jars don't mix well with rucksacks and fieldwork unless you're very careful.

My personally favoured method is the freezer - the beetles can be popped in for a while in their individually labelled tubes, and I admit that I reduce my guilt by not being able to see them expire. Mr Telfer says the downside of this method is that it leaves the beetles quite stiff when you come to pin them.

There's plenty more useful advice about these and other methods on the page linked to above.

Read on for information about how to pin and label your specimens.

Monday, 3 August 2015

Pinning and labelling beetle specimens

A very large scarab beetle from Ancient Egypt in the British Museum (CC image by Rachel H)
There's a lot of information on the internet (like this sage advice from Katy Potts), but it's a lot to take in and it may make more sense once you've had some practical experience? There's a few things to bear in mind though:

Relaxing (the beetles, not you):  if it's been more than a day or so since you collected them, the specimens will get brittle and there'll be more chance of legs and antennae dropping off. So you should put them in a sealed plastic box with some moistened paper (some people say vinegar) overnight (some people say longer) before you pin them.

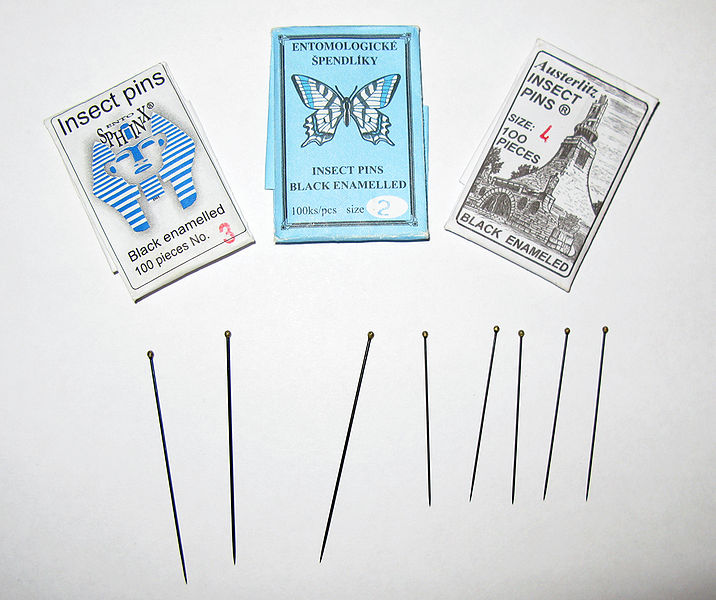
Pins: You need special entomological pins (I've written a page about suppliers here). They come in different widths. The bigger then number, the bigger the diameter, and you match the size to the size of your specimen. Although you can get very thin pins, I've discovered that they're hopeless for when you need to add labels, they bend. So I'd recommend you only use sizes 0 to 3 or more (even 0 is a bit small). You can buy your own pins or I do have some you can have to start with. If the beetles are too small, there are ways round this (read on).


Different insects are traditionally pinned in different places. Beetles are traditionally pinned through the right hand side of the body, through the wing cover. I sit them on a piece of expanded plastic foam so I don't pin myself in the process.

If you've got a small insect where a pin would obliterate it, you have the option of pointing, carding or staging them. Mr Telfer is big on carding but I'm not instinctively keen - it means you can't see the features on the underside of the beetle unless you de-glue it from the card. An alternative is pointing (which I've had moderate success with). You can buy or make small pointy bits of card which you skewer with a pin, and then bend the tip to glue it to the side of your specimen - preferably without plastering the entire creature in glue. Finally there's staging, which uses a tiny double-pointed pin which holds the insect to a strip of foam, which is in turn pinned as usual. To elucidate, here's an excellent picture I have willfully borrowed from the Queensland Museum webpages. I hope they would approve in the spirit of entomological education.

Examples of carded, pointed and staged specimens.
So your beetle goes on the pin first (pinned through the right hand elytra), and then you'll need to scrutinise it under the microscope to identify it.  Also at this point, you'll probably want to get its legs Just So, but without making them fall off. This takes patience and practice.

But when you leave to make a cup of tea, you mustn't forget where you found the beetle originally. I pin it through a little piece of paper that makes a temporary reminder.

When you've managed to identify it, you need to write out your labels. You could do this on a computer of course, but I quite like to write them by hand. You can consult the what, where, when and who pages for general advice. I use thin card (from an artist's drawing pad) and a super fine 0.05 pen with indelible ink (you can buy these in the SU shop). The labels are about 2x1 cm.

  You need to write two labels (or at least, this is the way I was taught to do it by an entomologist, so this is the way I am suggesting to you). One has the location and collector information on it, and the other has the identification and identifer. I was taught to put the location as the upper label and the identification as the lower label. I have to admit that this makes it difficult to see the identification and does seem somewhat daft.  So if you chose to do it the other way (or indeed a different way entirely) that would be entirely up to you.

So then you would use the pinning block (below) to add your labels to the pin. Ideally so everything was at 90 degrees, not like the slightly amateurish version pictured.

 You'll see that the pins go in the right hand side of the labels,
 and the beetle faces forward.

This all sounds quite dry but in practise it's quite absorbing, I find. It's certainly something that will suit people who like fiddly work, but don't let that put you off - I've definitely improved since I started, and the pinning is a minor part of the process. (I enjoy the collecting and identifying more)


Pinning block: This is really just a piece of metal with holes drilled into it, but it's very useful for making sure that all your specimens and their labels are at a consistent height. We've bought several so you can borrow one if you like.


The way I've been taught is to use the first (left hand) hole to position the beetle itself, and the 3rd and 4th holes for the location and identity labels respectively.

Then you can find a box to put your specimens in. I've been using transparent plastic boxes with close fitting lids. I line the bottom with a layer of foam. You can then add your beetles in some kind of taxonomic order (those in the same family together). You can also add some naphthalene in a little twist of material, firmly attached in a corner. That stops fungi and (live) insects who might like to eat your specimens. I can give you a bit of that - just come and ask.

You can buy expensive boxes from entomological supply companies if you're feeling flush, or improvise with something else - it's up to you.

Please do come in and have a chat about all this if you like, it seems a bit complicated at first, but it's not so bad when you actually have a go.

Monday, 27 July 2015

Taxidermy and pelts of small mammals

Stoat and weasel pelts. CC image by Kurschner.
This might be an option you'd like to try. Obviously it's not for the squeamish, but it's probably slightly less gruesome than the skull-defleshing, brain-scrambling option of obtaining a skull.

I will admit, I have no experience of this technique. It's possible that one of my colleagues does (perhaps Dave B.). If you want to try it, some first-hand advice might be the best place to start.

Funnily enough, technical details of the process aren't that easy to come by these days (it's not something that's going to appeal to the producers of Springwatch, for example). But there's been a resurgence of interest in taxidermy recently. This tutorial on the Dark Artifacts blog seems really clear - it shows the skinning and stuffing of a rat. It makes it look rather do-able.

In the past, unpleasant chemicals like arsenic were used for preservation. Borax or salt has been used as an alternative (you do have to get rid of all the subcutaneous fat for it to be effective). The animal's body is removed from the skin through a longitudinal slit in the abdomen. The tail and legs are supported by wrapped lengths of wire. The body is padded with cotton wool, and then the slit in the abdomen is sewn shut, as is the mouth.

The pelts we used to have were quite flat, like the stoats and weasels above. The body was supported by a piece of cardboard, rather than being stuffed. The front legs are directed forward and the back legs backward.

I also found a very comprehensive booklet online called Collecting and Preparing Study Specimens of Vertebrates, by E. Raymond Hall.  Its style certainly reflects the fact it was written in America in 1962. But once you've got past that, you may find some useful information. Mr Hall rather confidently says on p.18 that "with experience, less than a minute should be required to skin a mouse."

(Return to the main list of mammal methods)

Preservation of whole mammal specimens

If you've got a whole, unsquashed dead creature (the sort you occasionally find mysteriously flaked out on a path), you might want to preserve it whole - rather than going through the rigmarole of divesting it of its skull. I'm talking about something small - a shrew or a mouse perhaps. We have an example of a pickled hedgehog in OJ17.

You would preserve your animal in ethanol, as taxonomic collections of fish would be made. I can provide you with some preservative (usually 70% ethanol, 10% glycerol) but you might want to find a suitable container. You wouldn't want the animal's insides to decay, so I can also offer you a syringe with which to inject the body with more preservative.

A pickled baby panda (CC image Momotarou2012)
Above is an example you probably won't have in your collection (did you know baby pandas have long tails and no markings?). It seems to be mounted on a piece of perspex to hold it straight, but you might not want to be quite so elaborate. As with fish specimens, you should really put the label in with the animal (more information in the link above).

Another technique you could try is freeze-drying. I've not got very much experience of this, but the freeze-dried shrew I made one year was apparently successful (perhaps that's a sentence that's never been written before). I'm led to understand that it's a popular method in America for people who want to preserve their deceased pets. And the advantage is that you can freeze the animal in a life-like pose. So if you want to try this, we can experiment.

(Return to the main list of mammal methods

Preparation of mammal skulls

CC image of 'naturally cleaned' badger skull, by Spixey
If you're lucky, you'll find a skull that's white and clean, lying in the corner of a field and smelling of beautiful fresh air. A couple of years ago I happened upon a deer skeleton - some wretch had already pinched the skull but I was quite pleased to pocket a few vertebrae for their sculptural interest.

But otherwise, you've got a stinky and not entirely pleasant task on your hands.

I recommend Will's Skull Site for expert advice, so do start by reading that page.

Supposing you're starting with a disembodied head from some roadkill (we'll gloss over how you separated the head, and thank god that rabies isn't rife in the UK) - what are your options?

In an ideal world you'd have time to bury it, or leave it in a container that flies and beetles could get into.... somewhere well away from civilised society so you couldn't smell it... and then you'd come back later and the creatures would have done their work. You've probably not got time for this, and it won't help that you're trying to do it in the winter.

Will suggests removing as much flesh as possible. And scrambling the brains if they can't easily be removed. (I helped a student to do this once. I may not be volunteering again. You can see that this may not be a suitable collection choice for everyone).

Museums use dermestes (dermestid) beetles to help remove the rest. You can buy a small colony and as they tuck in to your specimen, the colony will slowly grow. They're quite easy to look after. But they don't like to get too cold. The problem is, there will be the most unholy stink, even with the tiniest skull. So it's not possible to keep them indoors (museums have special sealed containers and I'd guess that even then there are complaints) - you'd need some sort of outbuilding. I made myself unpopular by allowing a student to keep them in the undercroft at the university. I can't see this happening again.

An alternative you can boil up your skull - again, not a process that is going to make you popular with the neighbours - and you can use the enzymes in washing powders to try and remove the grease that will settle into the bone.

Another option is cold water maceration. It's slow - and you've guessed it, it stinks. You can read all about it, along with other very useful information, in this document by the University of Arizona and also on Jana Miller's site.

Having said all this, a collection of skulls does look very cool. And there's a lot of information online for those that are keen. But I for one still cannot shake the smell of those skulls of previous years out of my nose.

Dermestes beetles cleaning skulls for a commercial company. I can almost smell them from here. CC image by JimJones1971

I've recently found a blog with some very interesting insights into skull and skeleton form and function called Zygoma, which you'll probably enjoy reading (even if it generally refers to rather exotic specimens!).

What's In John's Freezer is another very interesting site (if you don't mind a bit of gore with your bones).

Young Jake has a page about cleaning bones too. His blog is full of useful advice on preparing skulls and identifying them.

(Return to the main list of mammal methods)


Identifying mammal droppings

Traces of Hedgehog (CC image by Rachtheh)
If looking out for animal tracks didn't make you feel like Ray Mears, surely developing expertise in identifying animals from their poo, will?

Not that I'm suggesting that all types of scat would be appropriate in your collection... no-one is going to thank you for a stinking scraped-up otter spraint (a photo would be best). But nice compact dry pellety examples - like rabbit or deer droppings - might be welcome.

I think you do need to be a bit cautious even then... it's not just any smell, there's going to be bacteria and possible parasites to consider. My colleagues may not thank me for this, but perhaps if you have samples you'd like to submit, you should bring them in and I can freeze and then freeze-dry them. I'd imagine that'd get rid of most things.

Naturally, whatever an animal has been eating is going to affect the appearance of its droppings. You might see seeds, fur or insect wings that haven't been digested, depending on species.  You'll probably have to accept that some are unidentifiable. But the details you record in your notebook about location and habitat might indicate some species are more likely culprits than others (squirrel droppings in Bristol aren't going to be from red squirrels, for example, and rabbits and hares leave theirs in different types of locations).

There's a slightly bizarre offering from the BBC Wildlife magazine here: "How many of these droppings can you spot?" 
but if you want something a bit more serious-looking and comprehensive, most books on mammals will give a few details. For example, we have copies of the Collins Field Guide to Mammals of Britain and Europe (McDonald and Barrett). The book I mentioned in regard to plaster casts also has details.

But one of the joys of the internet is that you can find a photo of practically anything. So confirmation in colour (in various degrees of reliability) is also not far away.

Update: Acer Ecology have made a page describing the finer points of difference between different bat poos. Isn't that nice. But do remember that meddling with bats incurs a stiff fine in this country. So no bat squeezing.


(Return to the main list of mammal methods)

Making plaster casts of mammal tracks

Tapir footprint (CC image by Christian Ostrosky)
This idea distinctly appeals to me, but I don't have any first hand experience to offer you yet.

I've been looking at 'Mammals of Britain: their tracks, trails and signs,' by M.J. Lawrence and R.W. Brown. Not only does it have pictures of individual footprints (quite easy to find on the internet), it has good illustrations of stretches of tracks - so you can see differences between front and rear paws, and see clues to the way the animal was moving at the time. Please do come and borrow the book (I've seen it cheaply secondhand too). If you've got the prints of something tiny, you can cast a length of them like this. Or you can just cast a single pawprint.

I like this chap's video very much - he's making a cast of a grizzly bear print near a glacier in Alaska, and he makes it look very simple. He surrounds the print with a dam of dirt to contain the plaster, but you can also use a strip of cardboard or a slice from a plastic bottle (as used by the British Badger Watching Man). I like the way he minimises mess by mixing the plaster in a plastic bag. And it's also instructive to see how he digs around the plaster to remove it without breaking it. You need to be patient and leave it to set for at least 15 minutes (the air temperature will make a difference, it could need longer).

His plaster looks quite thick - Lawrence and Brown suggest 'the consistency of evaporated milk' (if you even know what that is), or I've read 'thick cream'. But this is probably something you'll get to grips with as you gain experience.

You can allegedly buy plaster of paris at the chemist, or they would surely also have it in art shops (probably at a more expensive price). The Badger Watching Man mentions decorating filler... you could experiment.

The type of surface will also influence your success - Lawrence and Brown are very dubious about good prints from sand and silt - but then the chap with the grizzly bear print seemed to do very well on silt.

I also liked the grizzly bear chap's advice to scratch details into the back of the cast while it's setting. This wouldn't have to be all the what/where/when/who details - but a permanent connection to those details in your notebook would be good. You can always write on the cast afterwards when it's set.

The Mammal Society sell a kit that enables you to take inky footprints of animals that walk through a tunnel. That might be an alternative idea - it apparently works well in obtaining records of hedgehogs.

(Return to the main list of mammal methods)

Friday, 17 July 2015

Preparing fish specimens for a single tank

A single tank will be more work than jars, but it's a way you can display your specimens to better advantage. It'll be easier to compare identification characteristics if all the fish are lined up. For example, you'll be able to see the different number and position of the fins.

Dave B offered me some advice on how to set the fish into position when fixing them in formalin. I'm not a fan of formalin, but I think his method might be transferrable. I think it wouldn't hurt to try setting the fins into position while you're pickling them in ethanol - then they might be more inclined to stay in that position in your final display.

He suggests using a flat piece of cork or polystyrene (or similar plastic sheet), laying the fish on top, and using pins around the body to secure the fish in place. Entomology pins are good (I have some of these you can borrow) - they won't rust. You can angle the pins over the fish to stop it floating away (but be careful you don't distort the body too much or the grooves of the pins will be permanent).

Then use more pins to open and display the fins - you can make small holes through the fin rays and they won't show later.

You'd need to weigh down the cork / plastic sheet so the fish lay beneath the ethanol solution.

I wonder if you could also utilise some expanded plastic sheet to make a background inside the tank, to pin your fish against for the final display. Perhaps you could excavate a fish-shaped hollow to help support the specimens?

CC image by JD Wang
I can't seem to find any photos to illustrate this yet. So in the meantime I will have to leave you with another fish-art collaboration called 'Gyotaku' - a traditional Japanese method of printmaking which literally uses a fish (don't say you've learnt nothing today). This video by Heather Fortner shows how she pins out the fish in preparation for inking - much the same process as you might want to use yourself, so could be worth watching.


Friday, 3 July 2015

Preserving and presenting your fish specimens

Imagine the gasps of admiration if you handed in a collection that looked like this (fully labelled inside and taxonomically arranged, naturally). But unless you have a very healthy bank balance, all those perspex boxes are going to set you back a bit.

Students have been known to make one single tank to put all their specimens in. You have to remember though, that the larger the case, the heavier the amount of liquid inside. Watertightness has presented problems (and it's not water - it's flammable fish-flavoured ethanol) but it is possible. We've got an example you can look at - it's made from glass but you can also try using perspex sheets and plenty of silicon sealant. If you pick the single tank method, there's more information on this page.

A simpler solution is pre-bought jars (you'll appreciate that a matching set is preferable to random jam jars from the kitchen). You'll note that it's an advantage to have small specimens...

CC image by Frank Schulenburg
Here are some fully labelled fish in jars at the University of Michegan. You'll notice that the labels are inside - so the writing needs to be permanent and the paper needs to be sturdy. You could write them with pencil or find a suitable archival quality pen (there are some very fine-nibbed ones in the SU shop; they're marked 0.05 and 0.1). That would be fine (if your writing's illegible you might want to hire an assistant). Alternatively, you might be able to get printer ink that'll take the strain. However, there's some discussion here which isn't very encouraging - it would be a great shame to come back and find your hard work a black sludge in the bottom of the jars.

Museum collections (as mentioned in the link above) would attach the label physically to the specimen - usually by threading through the gill cover and out through the mouth with a piece of cotton or wire. You might not want to do that with a big label, but you could make a small one with a number on that matches the number on the larger label (perhaps made of dynotape or something similar). Or you could just go with the label in the jar. It's up to you.

Glenn Roadley's picture from the NatSCA blog

In the spirit of sharing enthusiasm for pickled fish (a niche interest), I hope Glenn Roadley wouldn't object to me showing you his angler fish photo as an example of the gillcover-mouth label technique. Glenn is a Natural Science Collections Assistant for museums in Sheffield. The lucky beggar.

Read on for information about identifying your specimens.

Thursday, 2 July 2015

Dealing with snails in their shells

When I first started reading about snails, I discovered this book, "The Collector's Manual of British Land and Freshwater Shells" by Lionel Ernest Adams. It was written in 1896. It hasn't got up-to-date taxonomy or keys, but I like it very much because I warmed immediately to Mr Adams. He says in his introduction:

It may sound a bit batty but I really do hope that's something you'll take with you from this assignment - yes you'll have a new skill and a mark towards your degree, but maybe you'll also be developing a life-long interest in the nature around you, and find that that interest supports your mental wellbeing in the future.

But anyway. Lionel Adams has plenty of advice that still stands about searching for specimens, and I encourage you to read it. I think he would have been jealous of today's range of useful plastic pots. He has some very eccentric stories about leaving snails under his tongue and completely forgetting about them. He goes on:

"Any one who has tried it knows how difficult it is to get boiling water to clean the shells at night in an hotel or lodging-house, and even if this be forthcoming, how impossible it is to carry on operations in peace and quietness. To meet this difficulty I have a small spirit lamp with a folding tripod stand [...] There is, however, sometimes a difficulty in the disposal of the boiled corpses. My usual plan is to wait for a lull in the traffic and carefully empty them out of the window. This plan is not perfect, I must admit, for, in spite of all reasonable care, this operation has on several occasions given rise to much profanity in the street below."

Immersion in boiling water remains the advice for extracting snails in modern guides. Mr Adams recommends leaving larger specimens in for half a minute, but not leaving small species in for more than a few seconds, or the bodies snap and get stuck. He suggests using a bent piece of wire or pin to extract the fragments. This is all on pages 10 and 11.

I've also read about using microwaves. I'm sure Mr Adams would think this a brilliant development. But unless you've got a spare microwave I do not recommend it - I've no idea what will happen. It's difficult enough trying to share a kitchen with other students and this is not going to endear you to them. Regardless, here's the paper.  But don't say I told you to do it.

All this is clearly going to involve Death (and you may like to read Mark Telfer's page about beetles if you'd like some reasoned justification for this). But if you're not keen to despatch molluscs, you may still find enough empty specimens to make an excellent collection.

(Return to the main mollusc page)

Wednesday, 1 July 2015

Preserving and presenting your seaweeds

In the name of educational advancement, I hope the University of British Columbia Herbarium don't mind me showing you this beautiful example of a seaweed herbarium sheet to inspire you.


Larger sturdier specimens can be pressed immediately between newspaper in a botanical press - remember to lay them out in the arrangement you'll want for the final display. You might need to check and change the paper more often than for less soggy plants - you don't want your specimens to go mouldy. Some herbaria recommend cutting the biggest stipes or structures in half if you want to press them. (Peter Mcinnis suggests that they can be encouraged to press by being soaked in hot seawater - I guess, bring some home with you and heat it up!)

The specimen in the photo at the top will have been 'floated'. For this you'll need a tray of water. If your seaweed is rather delicate, it's likely to end up stuck to the paper you use now - so herbarium paper or artists' paper is good (we have some you can use). Put the paper in the tray (possibly with something as a firm layer behind it) and spread your specimen out on top, so the water helps you arrange the delicate structures with forceps or a paint brush. With really bushy specimens (eg. the calcareous red species) you might want to prune some areas so the branching patterns of a single layer are more easily seen. Grattan describes the process in detail (he does suggest you need a porcupine quill and an ivory paper knife, but you can probably manage without those, thank goodness).

Image by Peter Mcinnis (public domain)
Remove the paper carefully from the water, blot it as much as you can, and then transfer to it to your press, layering with newspaper.  Don't forget a label!  Tighten your stack of specimens really firmly and put it in a warm pace to dry. When you reopen the press to change the paper, I've read that you should allow the papers to cool first or the specimens may curl.

W H Grattan's seaweed press
I've written some advice about making and using your own press here.

And what I've written here about mounting specimens will also have a lot of relevance for your seaweed collection - some you might want to tie on, or you might use glue.

Update: I've found this rather comprehensive guide to preserving your seaweed here, at the Cryptogamic Botany Company. It's easy to read and has lots of photos.